
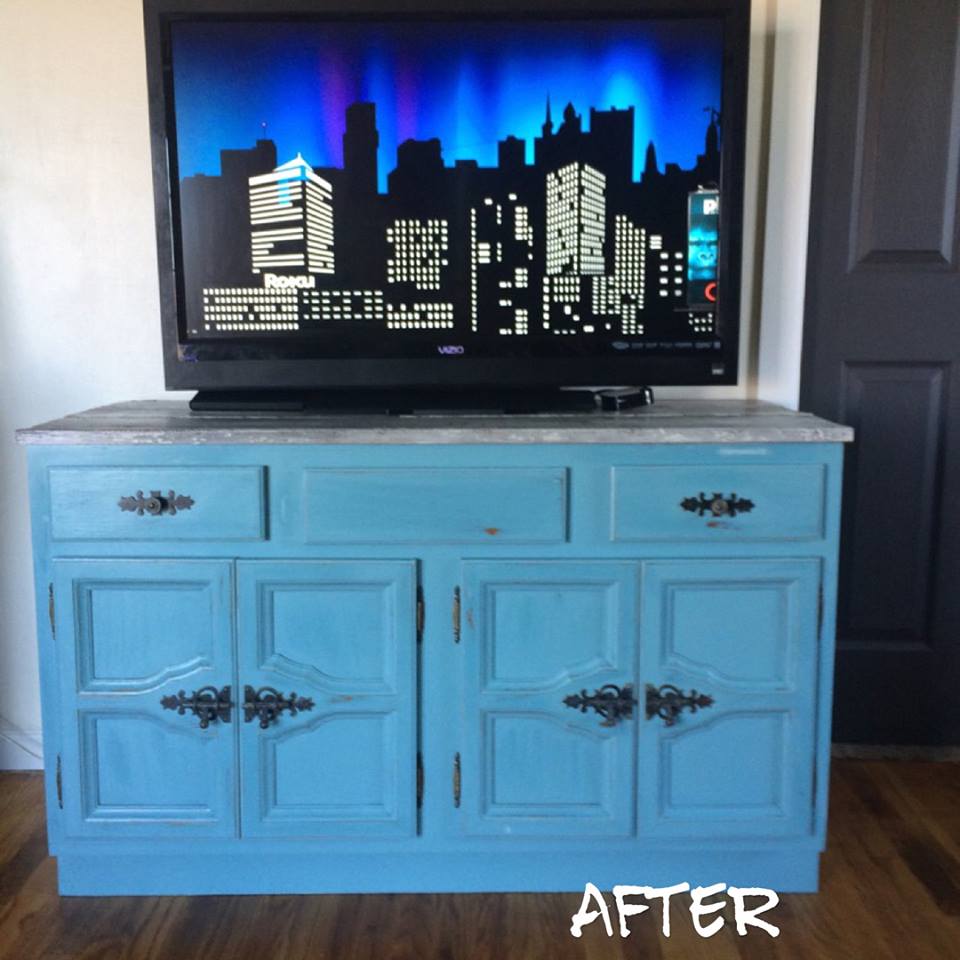
$30 T.V. Console Stand D.I.Y.

I have a talent! I have the gift of asking my husband to make me stuff. My sister also asks him to make her stuff too. This was just one of those things. A new coffee table from an old bathroom vanity.
Here is the Bathroom Vanity we bought from the Habitat for Humanity Re-store for $15.

Four things led us to pick this vanity to upcycle for this D.I.Y. TV Table:
Price, Storage, Cool old hardware, and lastly but most importantly - it was topless!
First thing we needed to do was take the hardware off. usually, all you'll need is a flat head screw driver to remove the bolts.

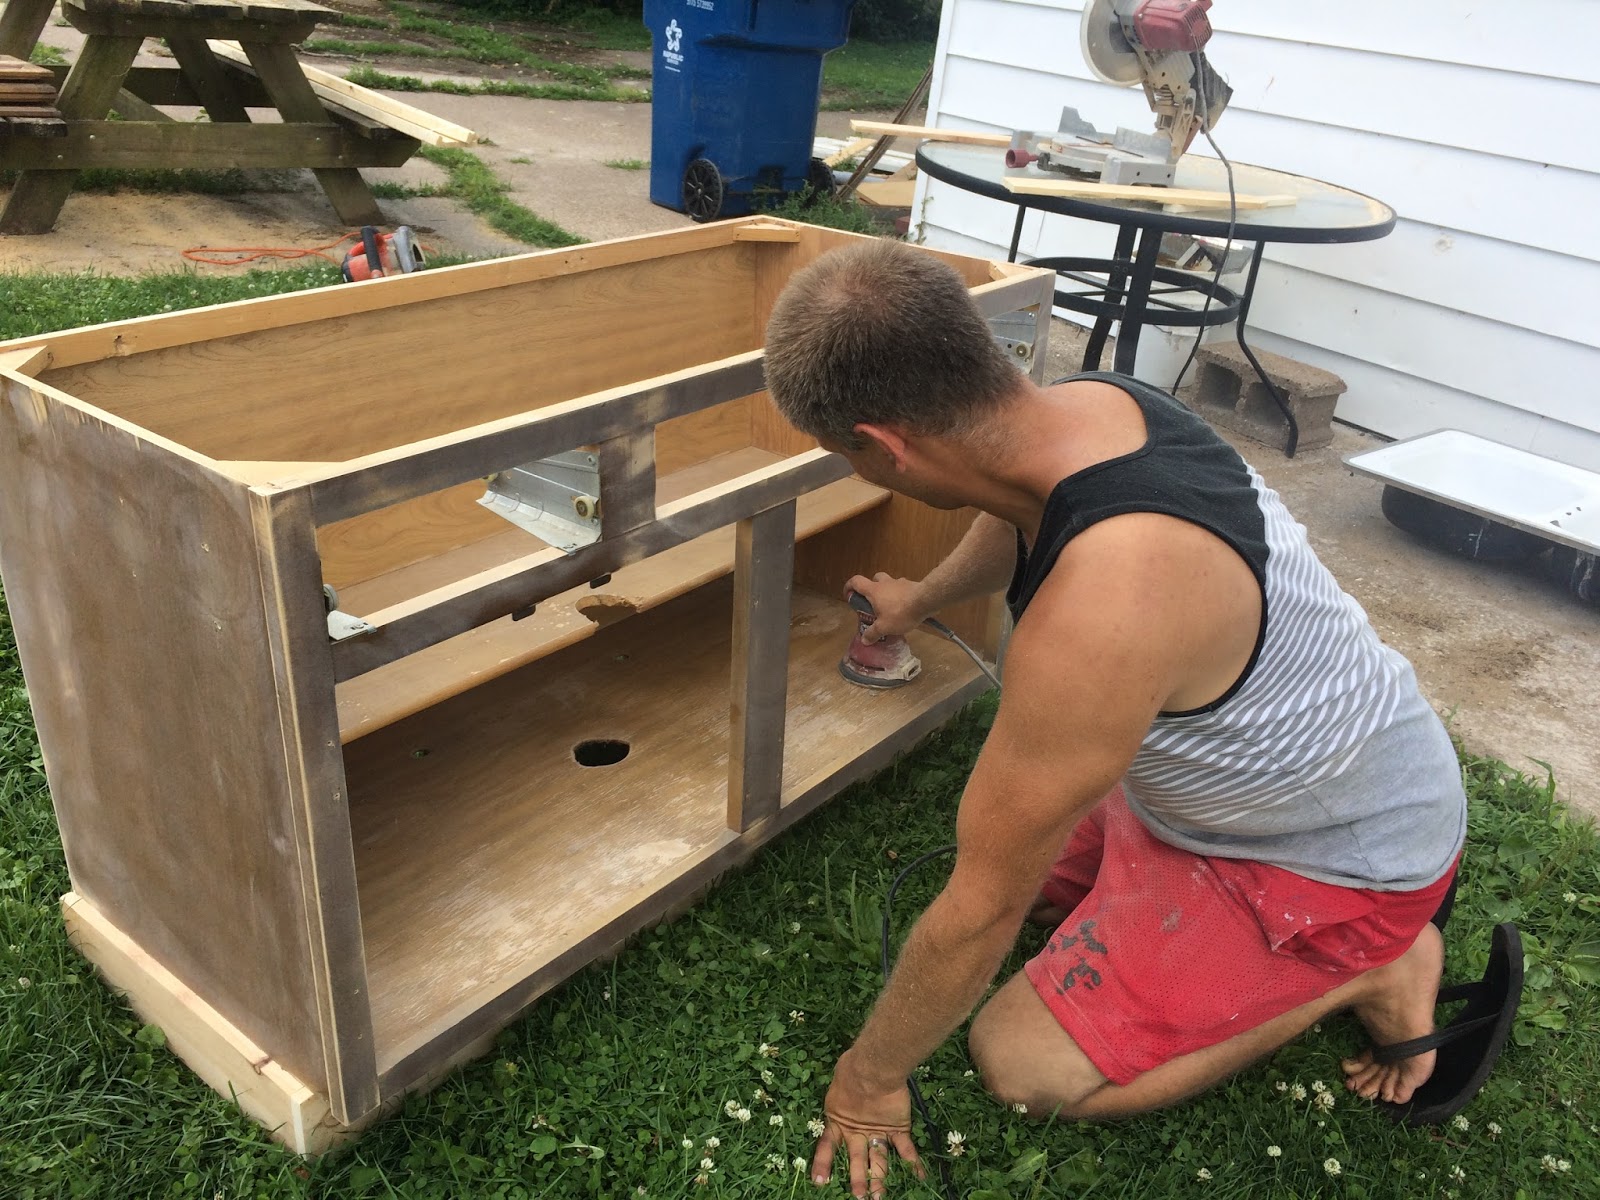
The next thing we needed to do was get rid of the ugly water damaged bottom of the cabinet. It was covered by some thick and super sticky glue from a rubber bumper that must have been there. We had some scrap cedar planks laying around so we used those for FREE!
 |
| Flip the table upside down and mark it with a marker |
 |
| Cut with a circular saw along the marked line |
 |
| Glue the skirting around the bumper making sure to keep everything flush |
 |
| Pin the wood to the table with 5/8 inch nails |
With skirting finished and hardware removed and the cabinet doors removed we were ready to sand it down lightly. For this task we used a random orbital sander with 120 grit sand paper.


Now it's prime time. For this design we only used white primer on the frame and not on the drawers or cabinets. We wanted the white to show on the rub-off only on the frame for dimension.


Next we mixed some old paint for the classic blue color we were going for. We used a chip brush and used two even and thin coats. after they dried overnight we replaced the drawers.

Next the hardware, cabinets and drawers went back on before the water based poly.


While the Poly dries and between the 2 coats we built the table top out of some old wood from a renovation on the exterior of our 130 year old house next door. First to measure, then to lay out the wood.


Now to mark the wood with a pencil and cut one end after flushing up the other end.


Next we flipped the planks over so we could work on them from the top, but on the underside. We used the scraps from the cedar planks on the underside of the wood top to brace it. Glue and more brad nails. make sure to leave a few inches from the ends to allow it to drop into the top of the vanity.

Additionally we used hot glue to seal the cracks so the poly will fill the voids better.

After the hot glue dried we flipped it over and gave it a thin white-wash as well as a dry brushing. The combination of these two paint methods yielded a really neat result.

Next is lots of poly. This is water based poly and the wood was thirsty and rotting, not to mention it was baking in the sun on a 90 degree day. The poly was poured into the voids and cracks and quickly brushed with the same chip brushed used or the white washing for more texture.
By the time we were done with the poly we had used up the $15 quart. that's where the other half of the cost came from.
After the poly dried, it was time to glue and nail it down to the top o the vanity.


Now to let it dry outside for a few hours before bringing it in.

Finally we brought it in and hooked everything up to it. Everything fit very nicely inside with no wire mess because the extra wire fit under the skirting.
All done! I love this so much. Maybe you can make your husband do this for you, or if you're daring you can do it yourself! Happy DIY-ing.


Comments